An item is anything that is valuable to you that you’d like to regularly maintain or keep records about. You can add any item you want to Upkeepr. Your items are organized alphabetically on the items page. View detailed information and associated activities for each item.
Note: You can click on the Cancel button on any pop-up window to cancel your action and go back to the previous screen.

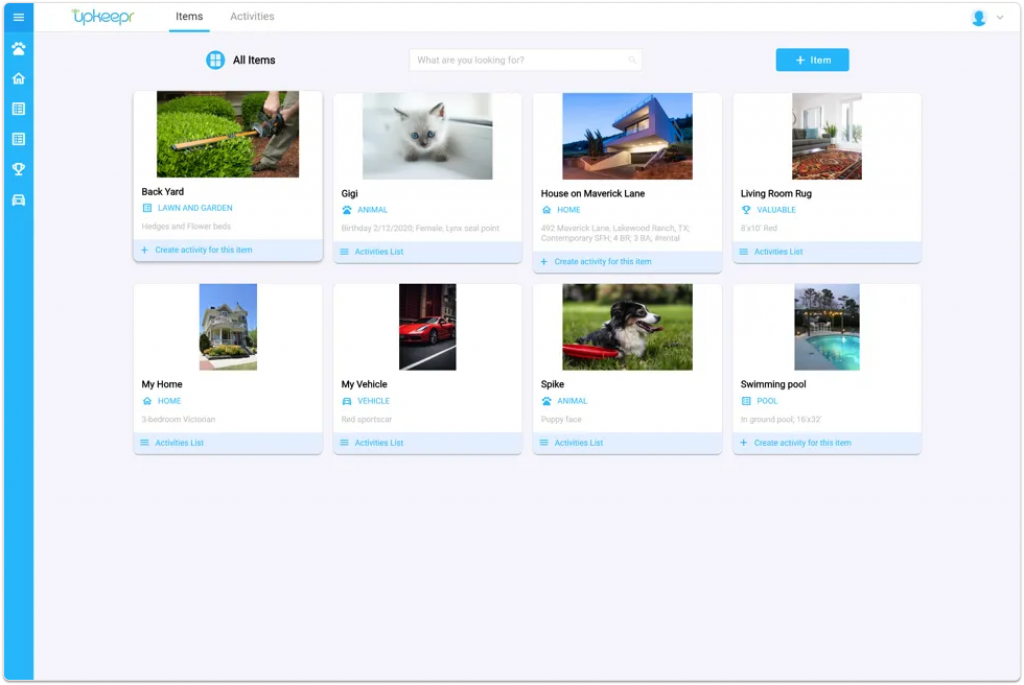
Click on Items in the top menu bar. A view of all the items in your Upkeepr database appears in alphabetical order. Each item is displayed on a tile which contains a picture of the item, the item name, the item category, and a brief description.
Click the +Item button on the top right to add a new item to Upkeepr. The Create New Item screen allows you to add information about your item.

Click on the Item Type field to view a drop down list of suggested item types. If applicable, choose one of the item types in the list or create your own custom item type by clicking in the field again and typing a new item type.
Next, give the item a name, such as “House on Maverick Lane”. Tab to the next field.
Enter a brief description of the item in the Description field. Here you can add details associated with the item. For example, you may want to record the address of the property, type of dwelling, year built, or anything else you want. You may want to use a hashtag, like #rental, to display search results for multiple items with that tag.
If you choose one of the item types from the drop down list, a gray icon associated with that item type will appear to the left of the field and cannot be edited. If, instead, you enter a custom item type, the icon to the left appears in blue and can be edited to match the custom item type. See Changing the Item Icon for a description of how to edit the Item Type Icon.
Click on the blue Item Type Icon that appears to the left of a newly created, custom item type. A list of available icons appears. Select an icon that corresponds most closely to the custom item type created.
Select OK to save. The new icon appears to the left of the custom item type and can be changed again, if desired.

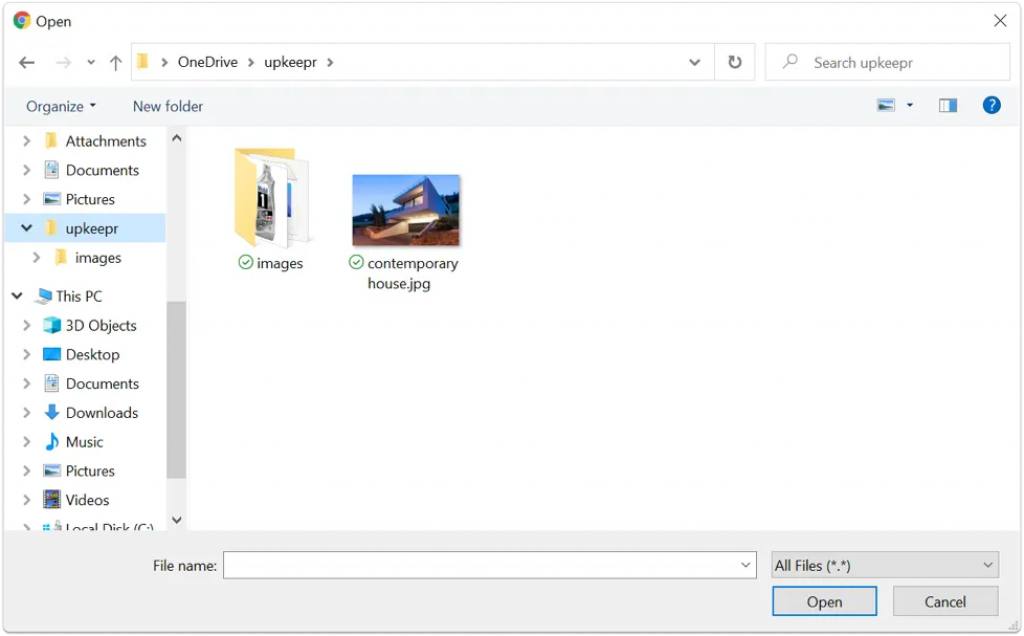
Click in the Add Photo box. A Windows file manager window appears. Find a photo of the activity that you are creating and click on it. The file name appears in the field at the bottom of the window. Click the Open button. The photo appears in the photo box. You can add up to six photos to each item. Just click in the box again to add another photo.
When you have finished entering your information, click on the Save button on the top right of the screen. Your new item will appear on the items page, in alphabetical order by Item Name. Simply click on the item to return to the Edit Item page. To schedule an activity for your newly created item, you can click on the item to open the Edit Item page. There, you can add a new activity for your item. See Adding a New Activity for an Item below.

Your new item will appear on the items page, in alphabetical order by Item Name. Simply click on the item to return to the Edit Item page.
Add as many items as you wish to your Upkeepr database.
Activities can be scheduled for an item in one of three ways. To add an activity to an item from the Items page, simply find the item for which you want to schedule an activity and click on it.
The Edit Item page appears with the details about your item. At the bottom of the page, there is a collapsed section titled Associated Activities. Click on the chevron to expand the section.

Start by adding an Activity Name. For example, I may want to schedule time to clean my carpets, paint my bedroom, or power wash my deck.
Next, set a due date for the activity by clicking on the Due Date field.
Setting a due date:
Click on the Due Date field. There are three options at the top of the window, Once, Recurring, and Scheduled. The default setting is Once, which allows you to set a due date for only one occurrence of the activity. Recurring allows you to set a regularly scheduled recurrence and an end date for the activity, such as every two weeks after completion for the next four months. Scheduled lets you choose multiple dates on which to complete the activity. For example, you may want to fertilize your lawn on April 5th, June 30th, and September 16th.
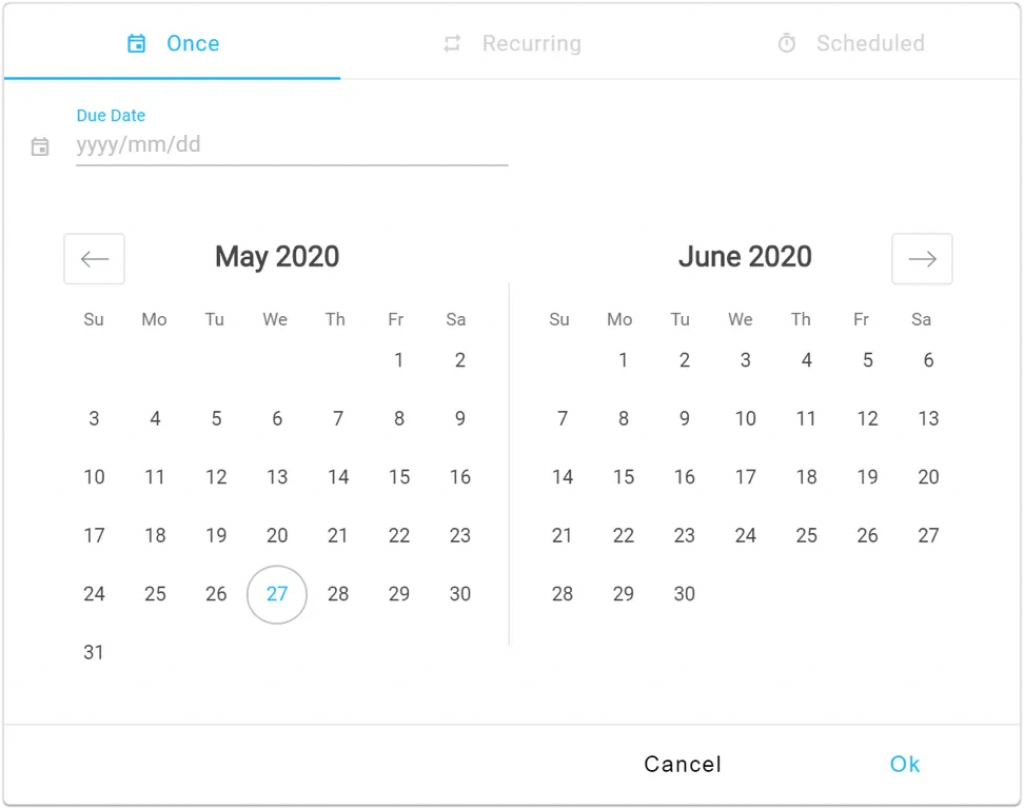
To schedule only one occurrence of an activity, simply click on the Due Date field. A calendar appears. Navigate through the calendar with the right and left chevrons. Select a date from the calendar or simply fill in the due date field at the top of the screen (yyyy/mm/dd) and click on the OK button. Upkeepr will add this activity to your chronological list of activities on the Activity page and you’ll see the due date you’ve selected in the Due Date field on the Edit Item page.
Notice that the +Create Activity option to the top right of the Associated Activities section is now highlighted in blue, indicating that you are now ready to add the newly scheduled activity to your to-do list. Click on the +Create Activity option to add the new activity to your to-do list.
To learn how to set a recurring due date or an irregular recurrence, please click here.
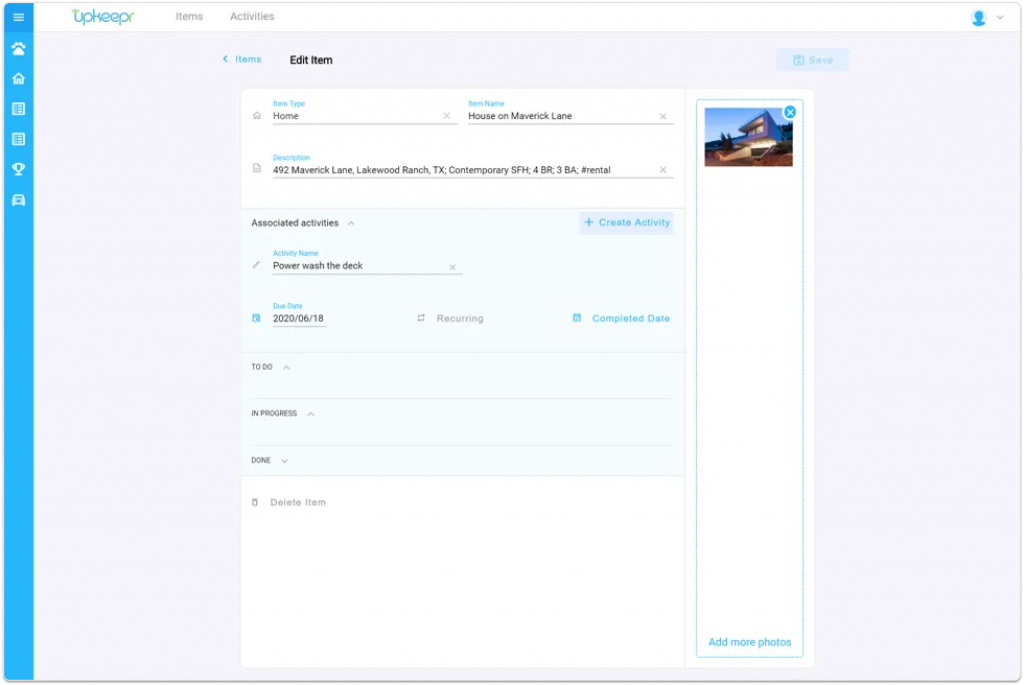
To see a list of activities scheduled for an item, simply expand the collapsed To Do, In Progress, and Done sections on the Edit Item page.
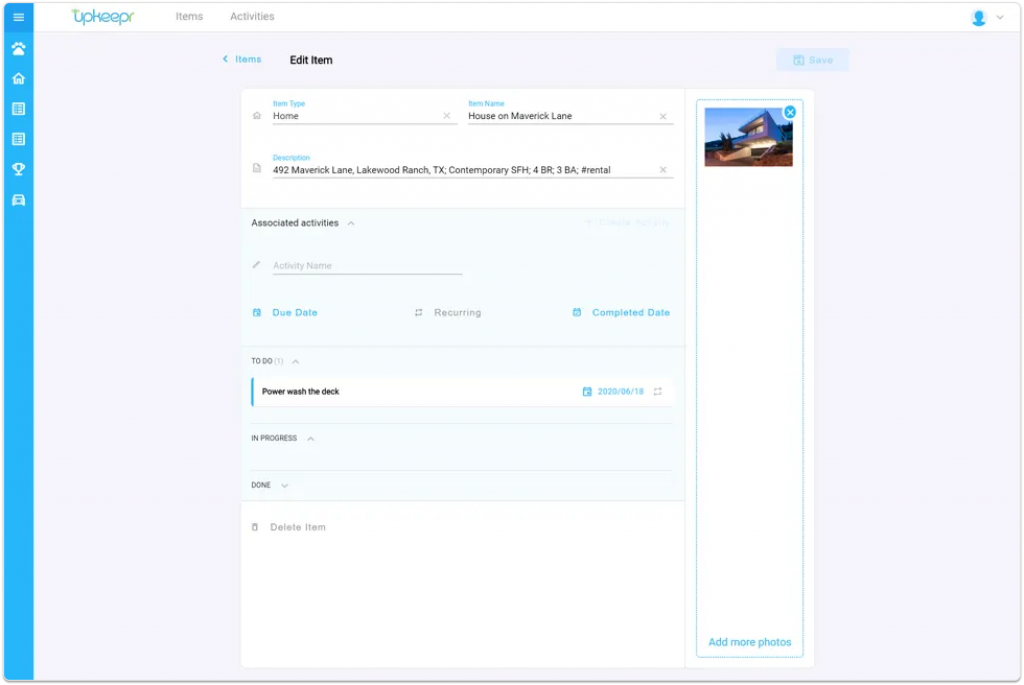
Each activity for the item is displayed according to its completion status. For example, the activity “Power wash deck” that was just created it displayed in the To Do section. As the status of the activity is updated to In Progress or Done, the activity can be viewed in the corresponding section.
Click on any activity in the item’s activity list to go to the activity detail page. There, you can view and edit the activity.
You can delete any item from Upkeepr at any time. Note that all activities associated with an item will also be deleted when the item is deleted.
To delete an item and its associated activities, simply click on the Delete Item option located at the bottom of the Edit Item page.
A warning message appears, notifying you that all associated activities with the item will also be deleted. This action cannot be undone, so please exercise caution when deleting items and associated activities.

If you are sure you’d like to delete the item and all associated activities, click on the Delete button.
Copyright 2022 – Upkeepr Corp – All rights reserved